NIGHT VISION
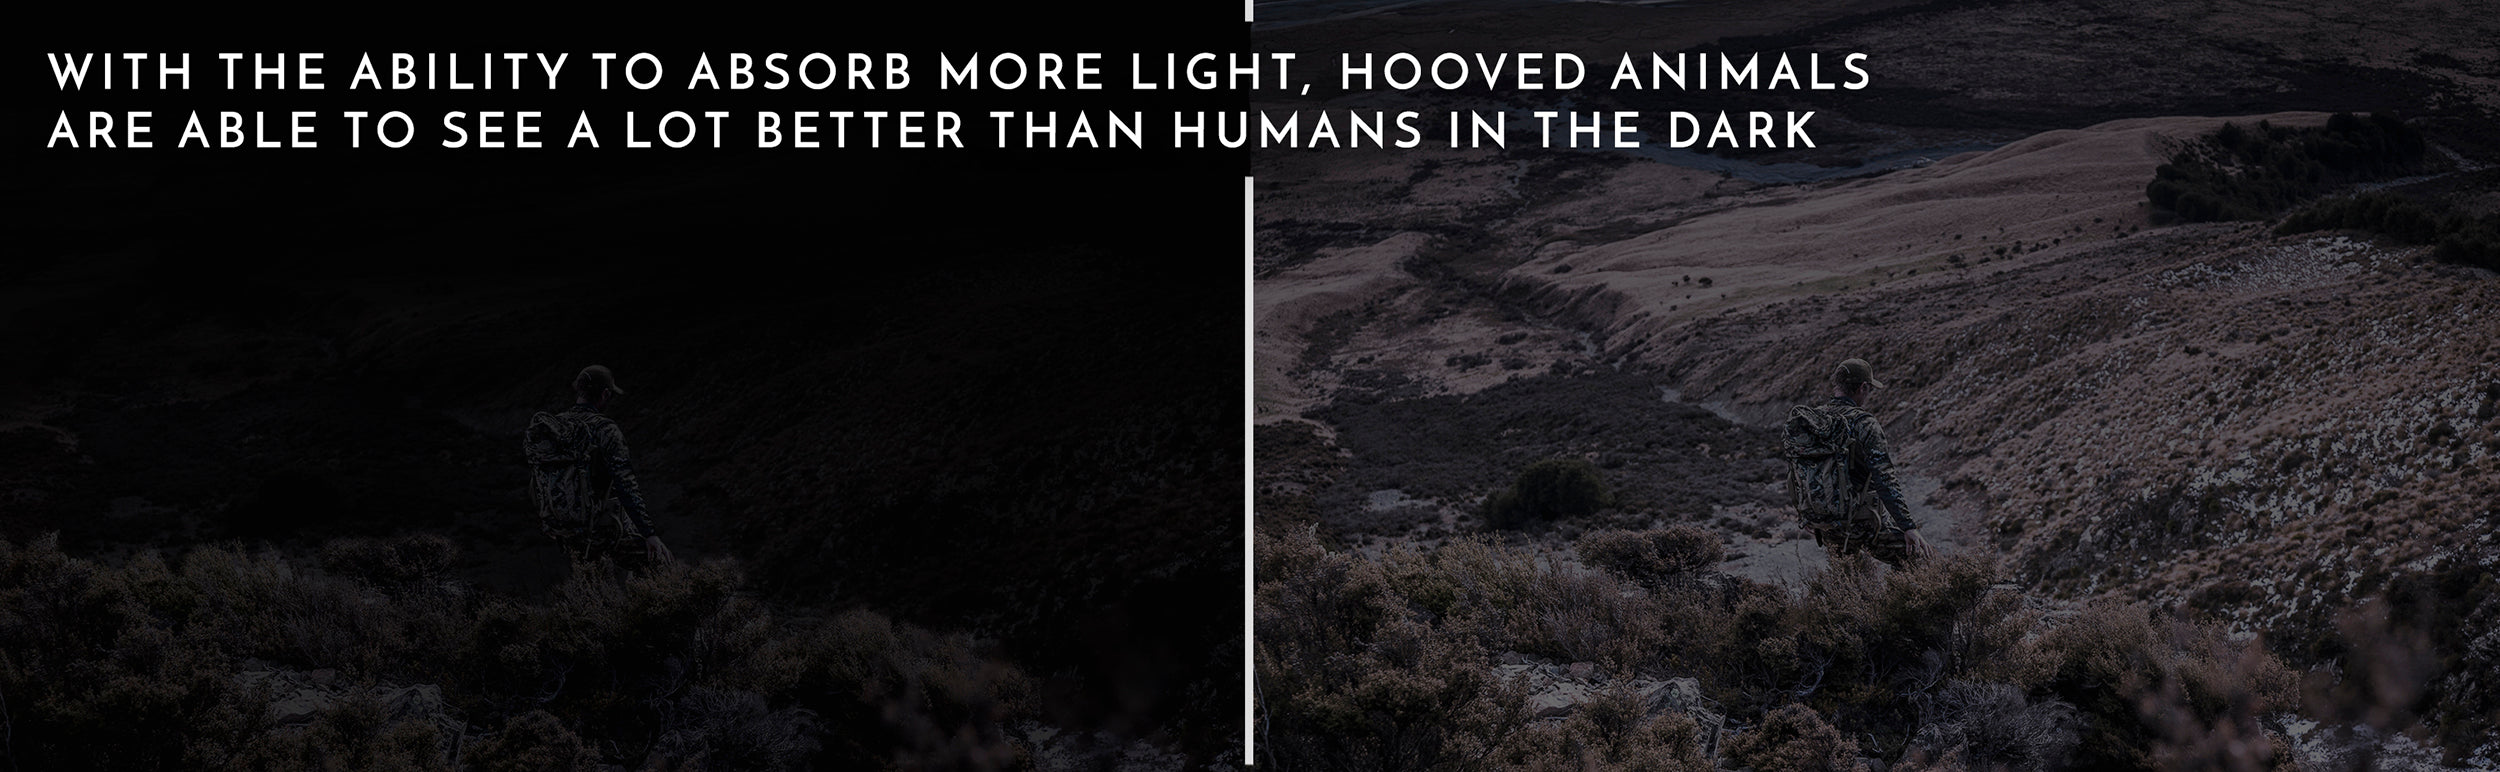
How animals see at night shouldn’t really affect most hunters as we can’t see ourselves. However, it is interesting to shed some light on why deer are more likely to move around at first and last light. Ungulates have a layer in their eyes called the Tapetum Lucidum which sits just behind the retina. This layer acts like a type of mirror and this is what we see when shining a light at them at night. This layer sits at the back of the eye so that any light that isn’t absorbed by the retina on the first pass, gets a chance to be soaked up on the way back out.
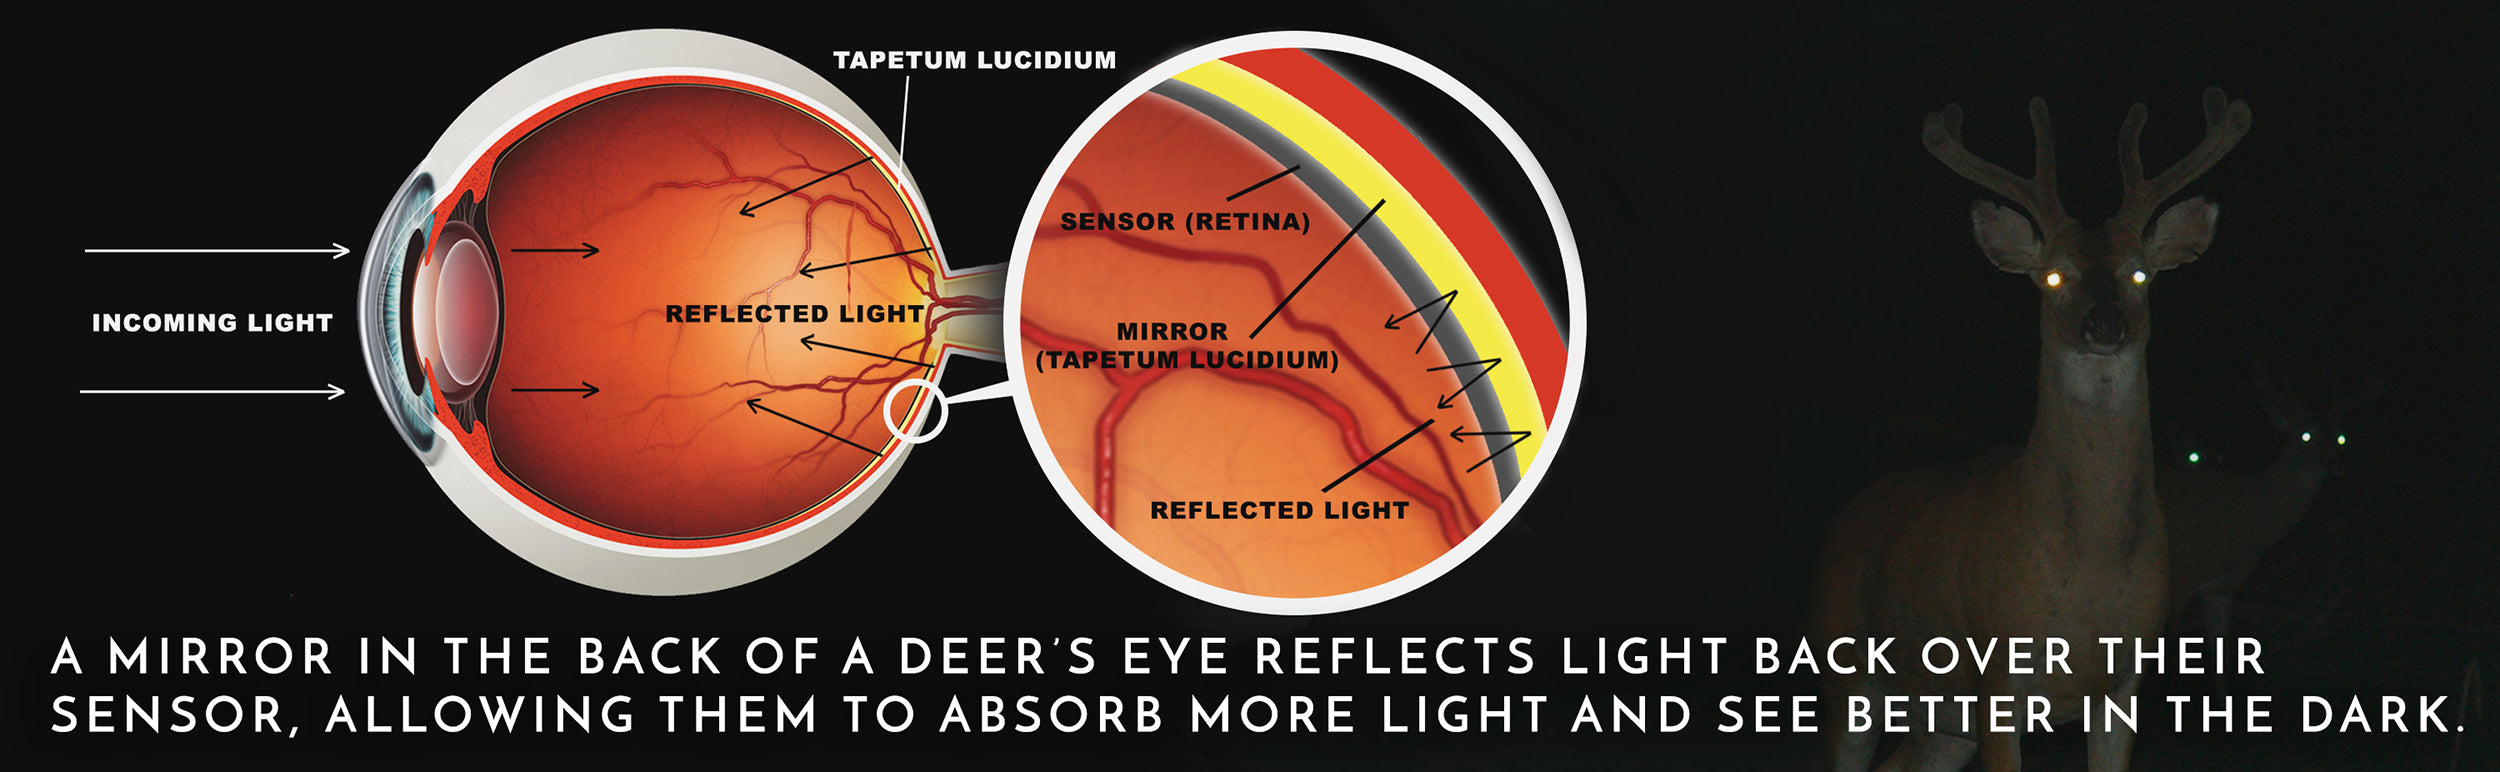
Because of this process deer and most other hooved animals have far greater night vision than humans. This Tapetum Lucidum layer has probably evolved to give prey animals the ability to feed at night under the cover of darkness when their predators are in bed. Unfortunately for the prey however it seems that most of their natural predators, big cats, dogs etc, have evolved to keep up and now see just as well in the dark.
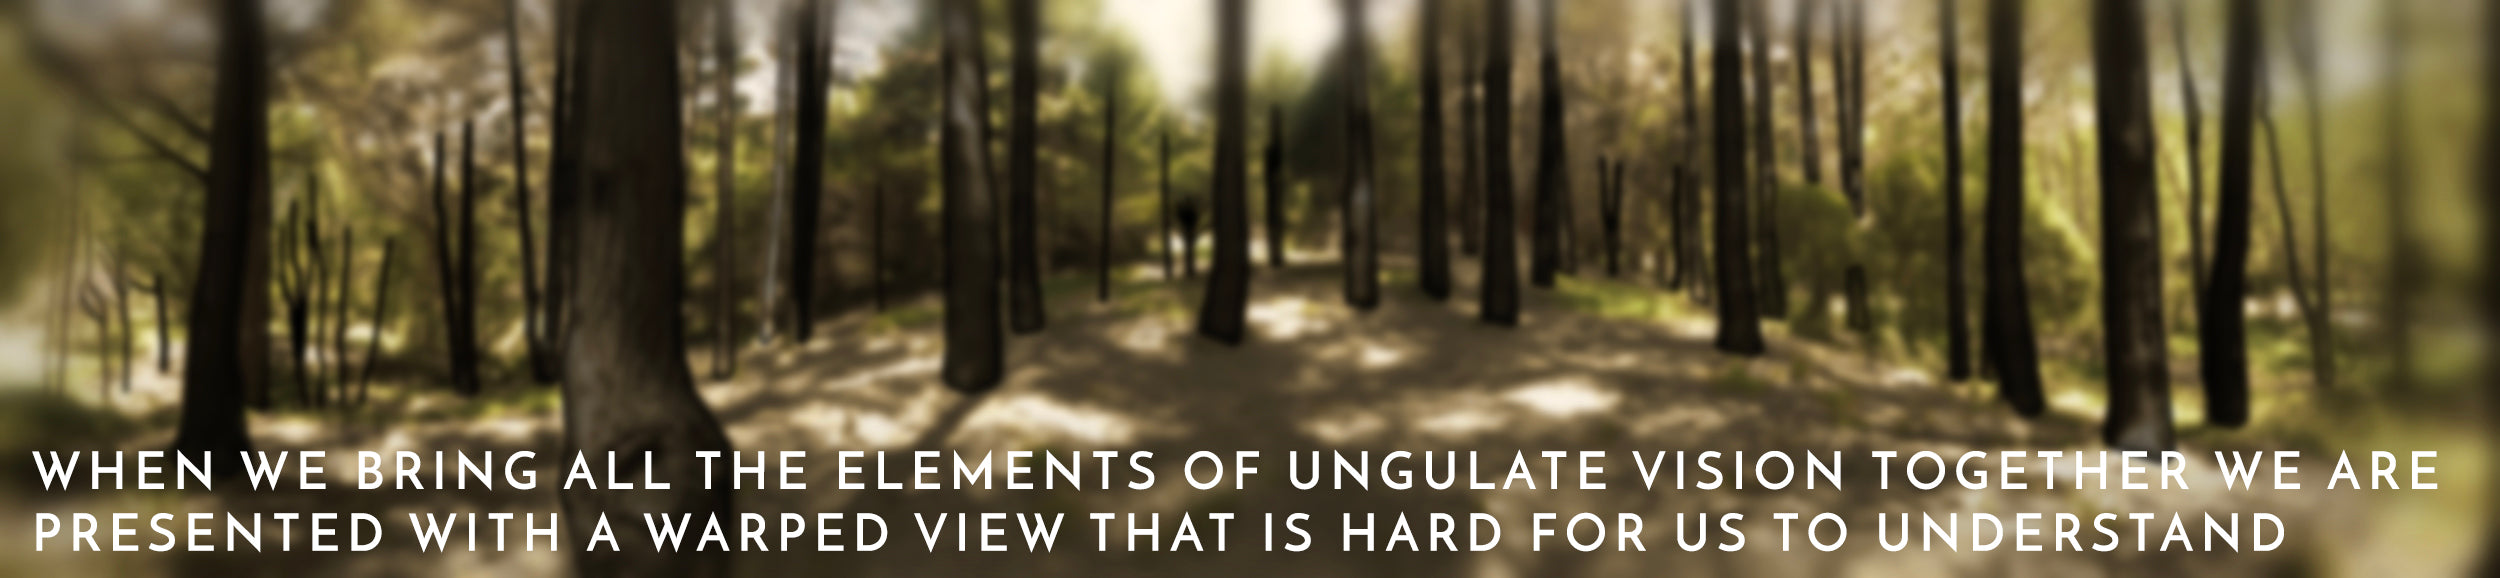
THE COMPLETE VIEW
When all these element are brought together the view looks extremely messy to our eyes. The important thing to consider is that although we cannot comprehend how the world would look through their eyes, we can use the individual aspects to draw a picture of how we can attempt to manipulate their weaknesses.
DRAWING INSPIRATION FROM NATURE
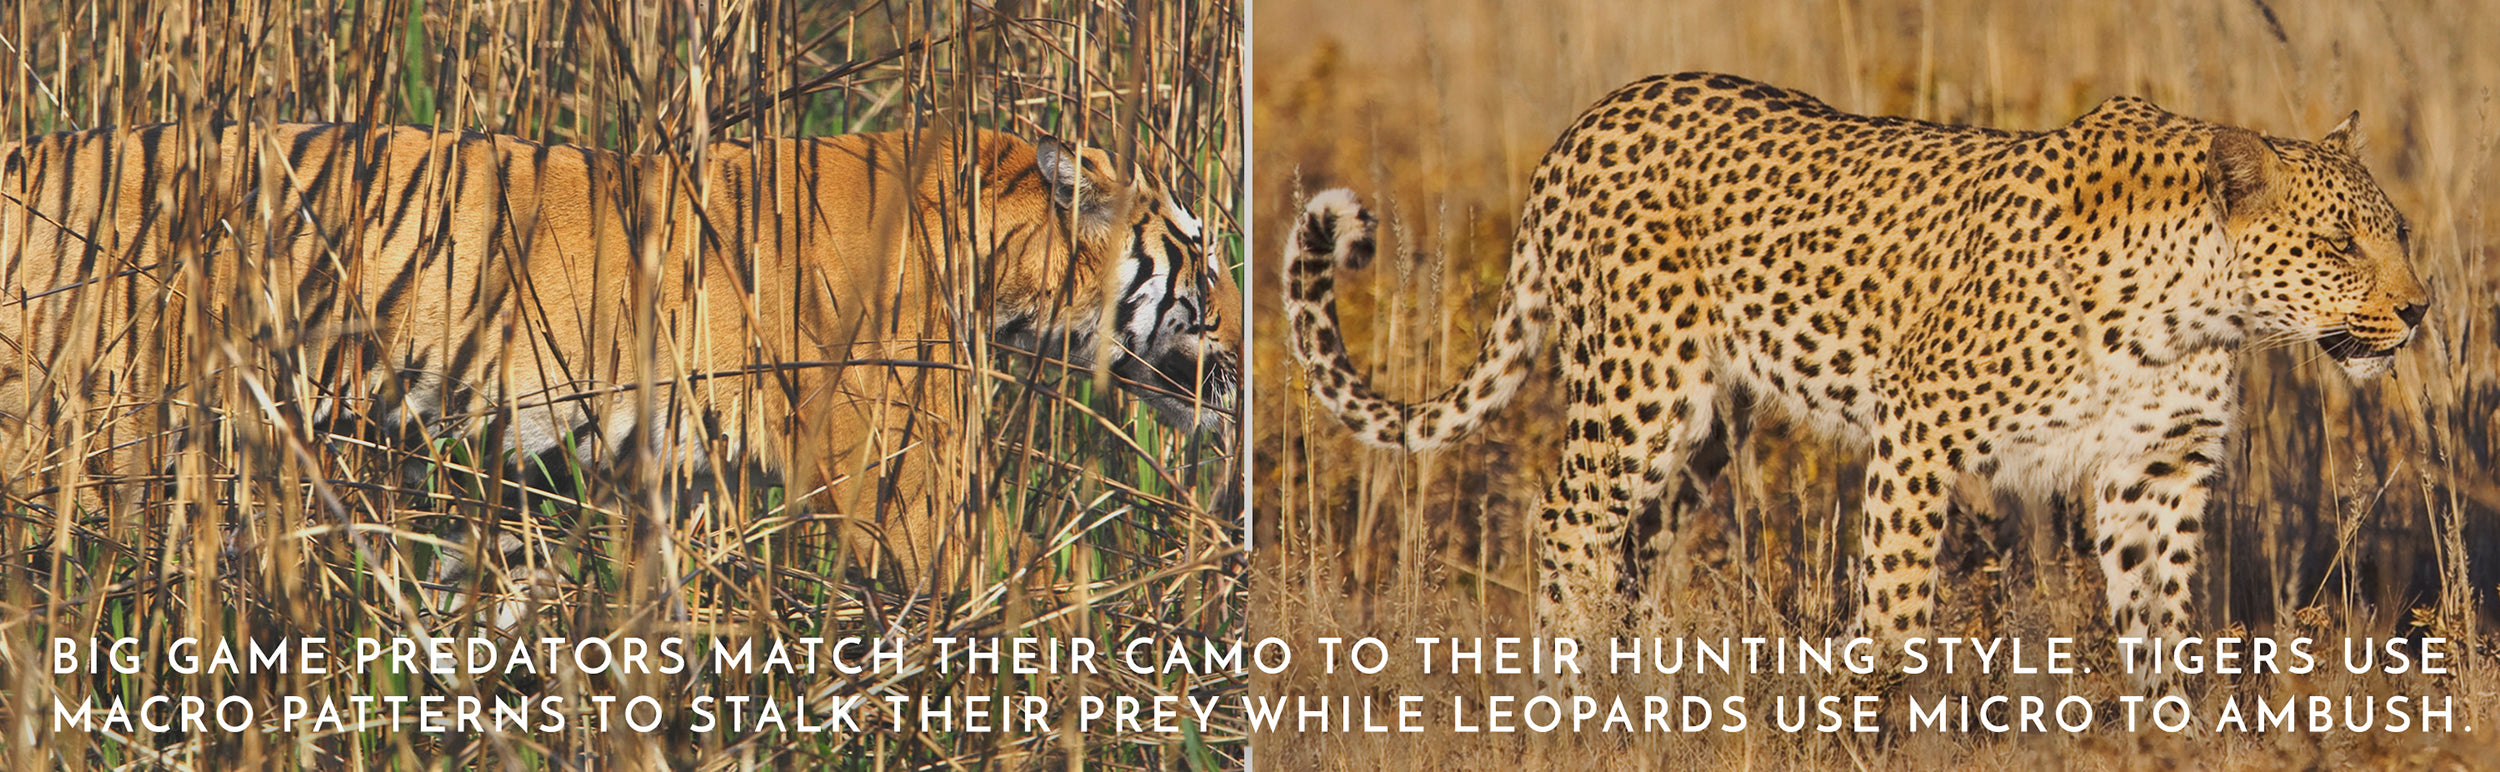
Both predators and prey throughout the entire animal kingdom utilize these elements of camouflage to disguise themselves. As hunters with a passion for the animals we target, we drew inspiration from some of these perfected hunting machines. Big cats are probably the best example of ungulate hunters and it is fascinating to see that they predominantly use two different methods of concealment. For example, Tigers use a macro or “broad range” pattern to conceal themselves. Their hunting style is more of a stalking method. This means that at a longer distance the tiger needs to be hidden as he closes the gap, much like a spot and stalk bow hunter. The leopard on the other hand uses a micro or “narrow range” pattern. Their hunting style is quite different in that they ambush their prey. They sit down tight and hide until the victim is close at which time they pounce. Therefore, a smaller detailed pattern is necessary up close. This could be compared to a hunter calling in close quarter rutting deer or tree stand hunting.
DEVELOPMENT AND TESTING
STAGE 1
With all this research behind us we proceeded to experiment with a large number of patterns that followed the principals of contrasting Micro and Macro patterns. Macro patterns can be thought of as the big chunks in the pattern. These are the most important parts as they are the ones that break up the outline from about 20 meters away and beyond. The Micro patterns are the small pieces of the pattern. These are used to for primarily to add detail for when the subject is close and to add the natural business of the environment. This is effectively used to break up the outlines of the Macro patterns. We drew up a large grid template and experimented with different ratios of Micro and Macro patterns until we had a spread of three variants, one with more micro that macro, one about 50/50 and one with more macro than micro. These were then advanced to the initial testing phase. Three basic shades of green and brown were used initially with the intention of fine tuning later. For the initial testing phase we photographed the three patterns at 20m, 50m, 100m and 300m. This process was repeated in three common and contrasting hunting terrains, forest, riverbed and open tops. These images were then filtered to remove the red colour spectrum to as close as we could determine an ungulate would see in. These images were then filtered with a couple of blurring effects to replicate the lesser definition described earlier. From here we had a series of “animal vision” images that we could compare to determine the best of the three patterns in regard to silhouette (outline) disruption. These blind tests quickly revealed that our 50/50 mix pattern was the best at creating this effect. With a few fine tweaks we had our first pattern ready for a more in depth testing phase.
STAGE 2
Now that we had our first pattern established. The next step was to take it out in to the field and experiment with it. We printed the pattern on large sheets on fabric and took them into the hills. We played around with wrapping the sheets around trees, rocks, people and so on and viewed these from a number of different angles, in a large variety of terrains and backdrops, at varying distances and of course photographed and filmed all of this so that we could later apply our animal vision filters to it. A few things became apparent from all the testing. First we wanted to experiment with a third size in our pattern. Something that would fit between the Micro and Macro size for a specific distance. At around 25m - 35m we felt the Micro wasn’t quite doing enough to break up the Macro edges. Next we needed to tune the colours to experiment with contrast. Contrary to mimicry patterns, the disruption pattern needs to be quite high contrast to give the illusion that two parts of the pattern are two different objects. We were able to experiment with this a lot on the computer by adjusting photos and from this we created another series of samples with the most promising shades for further field testing. We also decided to introduce a shadow element to our macro parts to help further this illusion of depth.
STAGE 3
As we were now starting to really fine tune the pattern we again followed the previous steps with testing in different light and distances, but we also started playing around with some blind “Where’s Wally” type tests. From the countless hours poured in to this testing we finally were able to proudly produce the Desolve Veil camouflage pattern.
COMPARING DESOLVE VEIL AGAINST MIMICRY PATTERNS
Now that we had finally had a strong understanding of how ungulate vision worked and how we could take a different approach to camouflage, we were able to compare our new disruption pattern to the popular mimicry patterns. Once again, we headed in to the field and photographed Desolve Veil next to the main mimicry patterns at a variety of ranges and terrains and apply our animal vision filters. The resulting images were astounding! The sticks and leaves patterns for the most part were instantly recognisable at all distances when not placed perfectly in among exact replicas of its pattern. The disruption pattern on the other hand melted seamlessly into just about every image as we had found in our testing phases.